
The concept
First thing you have to make up your mind is colours. White is white, black is black. Then, a 50% grey is a 50% grey. Simple, ain't it?
OK, then open any image in GIMP. You can launch the curves tool through "Colours -> Curves...", either from the upper menu or by clicking the right button anywhere on the image surface.
Starting point will look like this:
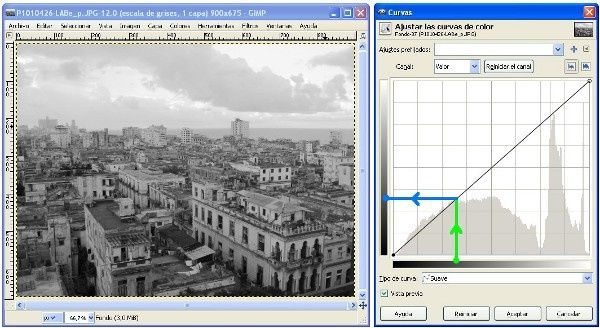
In that window, you can see a diagonal line, and two gradient bars from black to white: one in the lower side, showing current colour palette for your image. The other one on the left will show the output colours that you will get if you apply the adjustment.
This way, a 30% grey (green dot) corresponds, according to that diagonal line, to a 30% grey (blue dot). This is still clear...?
Usual transformation
If you click at any point over the diagonal, you will create a control point. It can be moved all over the square area, and the original straight diagonal will transform into a curve, dependant on the performed displacement... Below you will find the typical adjustments used in photography. Adjustments are exagerated in order to clearly see the result. Usual processes will keep control points nearer to the original diagonal...
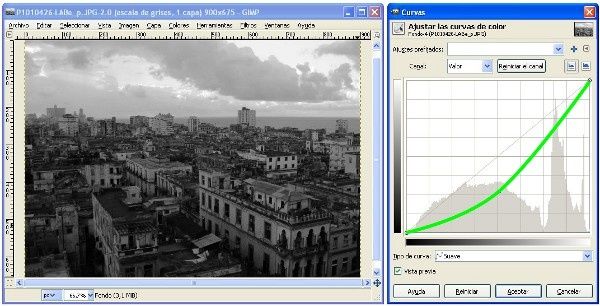
U-curve (in fact, it's a J): The curve will be located below the diagonal, thus output colours will be darker that original ones.
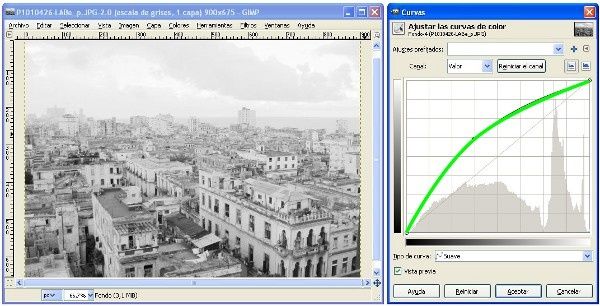
Inverted-U-curve (or rather, small-cap r?): Opposite to the previous one, the curve is above the diagonal. Output colours are lighter than original ones.
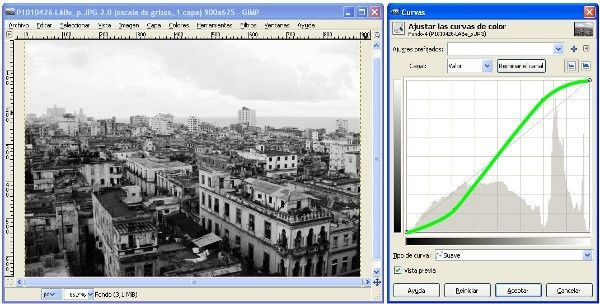
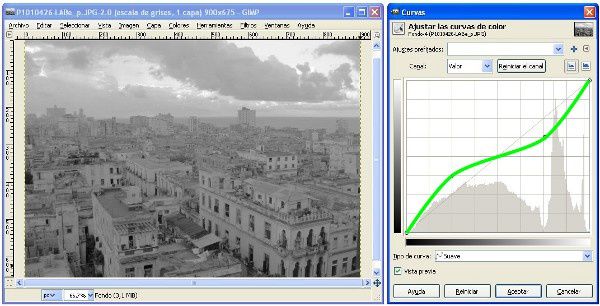
S-curve: Mix of the two above, light colours get lighter, dark colours, darker. Contrast is increased.
Inverted-S-curve: Light colours darken, then dark tones will go lighter. Contrast is reduced. I many cases, this will NOT be the right pick.
Further transformation...
You may create as any control points as you want, and give any shape to the curve. Result may look unreal - but also artistic sometimes. Check the following proposals:
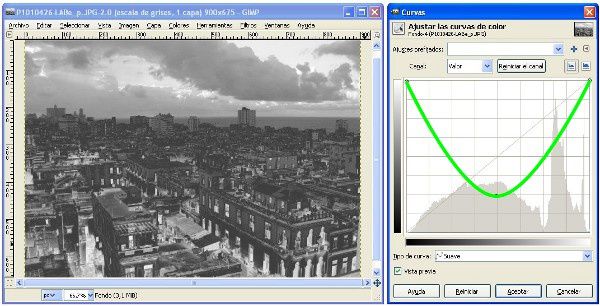
U-curve (now, it's a real U): only darkest colours get lighter. This is not a negative, for clear areas keep their levels.
Inverted-U-curve: It produces a similar effect to solarization in chemical development. High lights are strongly darkened...
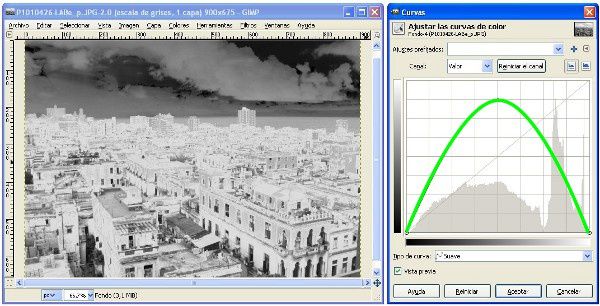
... and all this just with one or two control points. Try using tree or four points on the diagonal...
Originally postedn on June 15th 2012 (Over-Blog)
More posts on GIMP

No hay comentarios:
Publicar un comentario